![](https://www.lrt3.com.my/wp-content/uploads/2021/06/Drop-Down-Menu-3-Rebar-Work-in-Progress-Photo-1.png-3.jpg)
![](https://www.lrt3.com.my/wp-content/uploads/2021/06/Drop-Down-Menu-3-Rebar-Work-in-Progress-Photo-2.png)
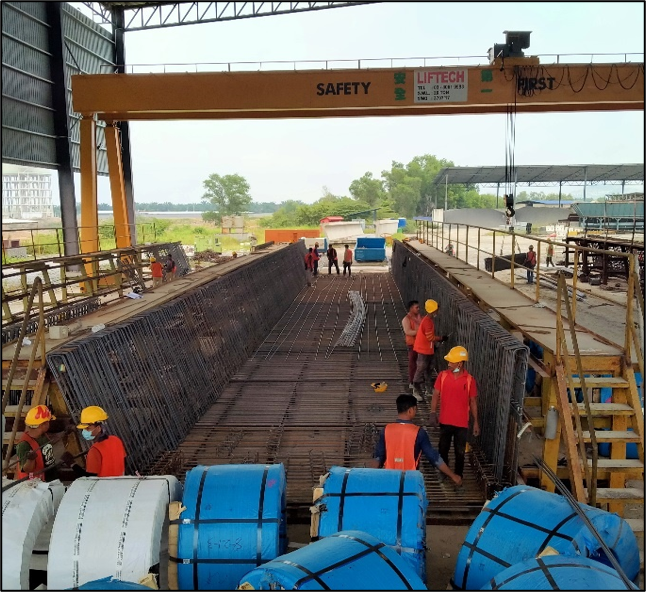
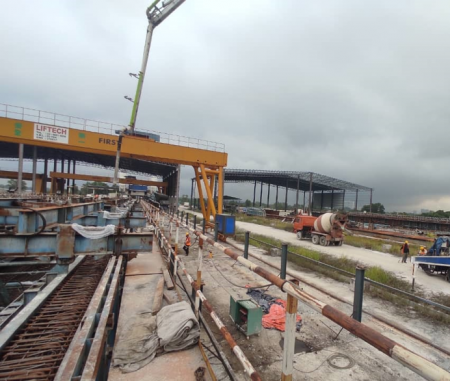
STEP 1: Rebar Works in Progress
![](https://www.lrt3.com.my/wp-content/uploads/2021/06/Drop-Down-Menu-3-Mould-Preparation-.png)
STEP 2: Mould Preparation
![](https://www.lrt3.com.my/wp-content/uploads/2021/06/Drop-Down-Menu-3-Lifting-Rebar-Cage.png-e1623211881889.jpg)
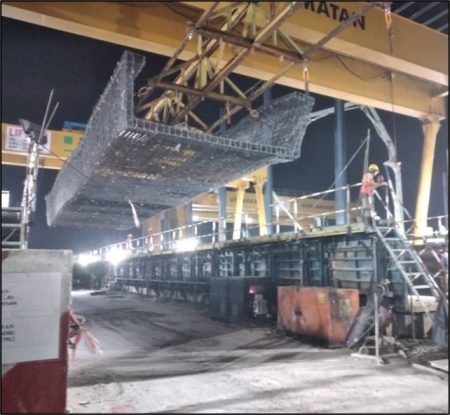
STEP 3: Lifting the Rebar Cage into the Mould
![](https://www.lrt3.com.my/wp-content/uploads/2021/06/Drop-Down-Menu-3-Threading-Strand-Wire.png)
STEP 4: Threading the strand wire and installation of cast-in items
![](https://www.lrt3.com.my/wp-content/uploads/2021/06/Drop-Down-Menu-3-Threading-Strand-Wire-using-Hydraulic-Jack.png-e1623211943280.jpg)
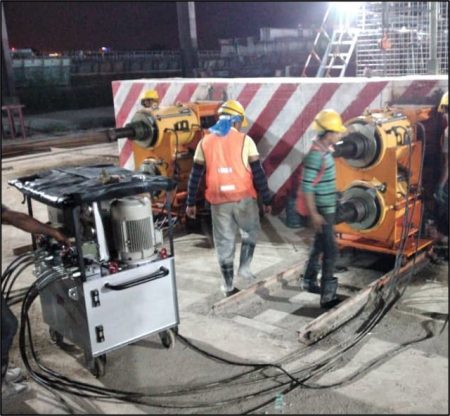
STEP 5: Stressing of strand wire using the hydraulic jack
![](https://www.lrt3.com.my/wp-content/uploads/2021/06/Drop-Down-Menu-3-Installation-of-Inner-Mould.png)
STEP 6: Installation of Inner Mould
![](https://www.lrt3.com.my/wp-content/uploads/2021/06/Drop-Down-Menu-3-Concreting-Work-e1623211986390.png)
STEP 7: Concreting Work
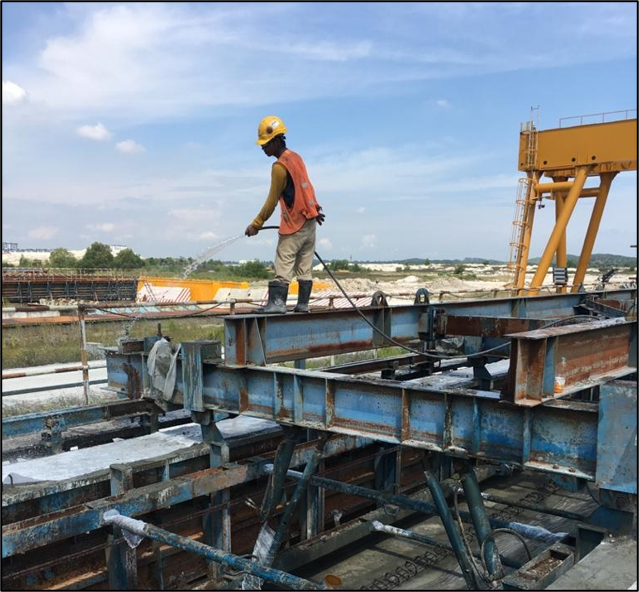
![](https://www.lrt3.com.my/wp-content/uploads/2021/06/Drop-Down-Menu-3-Curing-.png)
STEP 8: Curing
![](https://www.lrt3.com.my/wp-content/uploads/2021/06/Drop-Down-Menu-3-Demoulding-Inner-Mould.png.jpg)
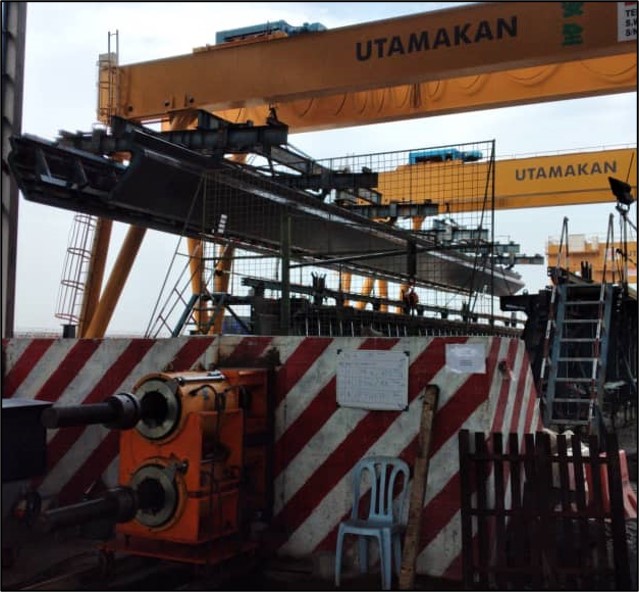
STEP 9: Demoulding Inner Mould
![](https://www.lrt3.com.my/wp-content/uploads/2021/06/Drop-Down-Menu-3-Destressing-and-Demoulding-U-Girder.png)
STEP 10: Destressing and Demoulding U-Girder
![](https://www.lrt3.com.my/wp-content/uploads/2021/06/Drop-Down-Menu-3-Post-pour-touch-up-and-repair-works.png)
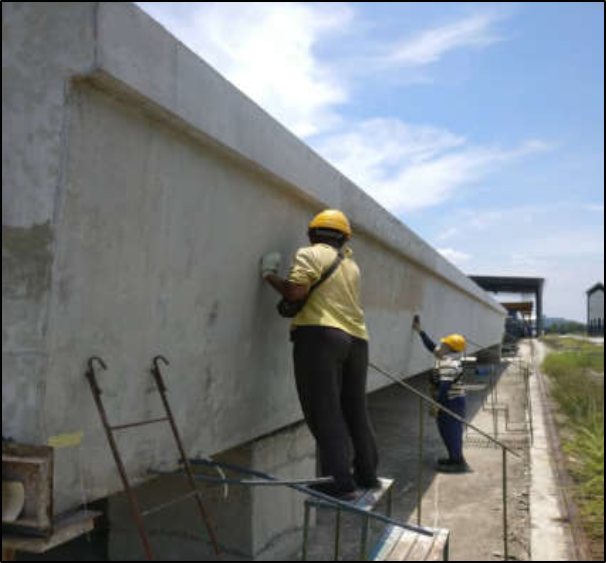
STEP 11: Post-pour touch up and repair works
![](https://www.lrt3.com.my/wp-content/uploads/2021/06/Drop-Down-Menu-3-Lifting-U-Trough-Girder-onto-Multi-Axle-Trailer.png)
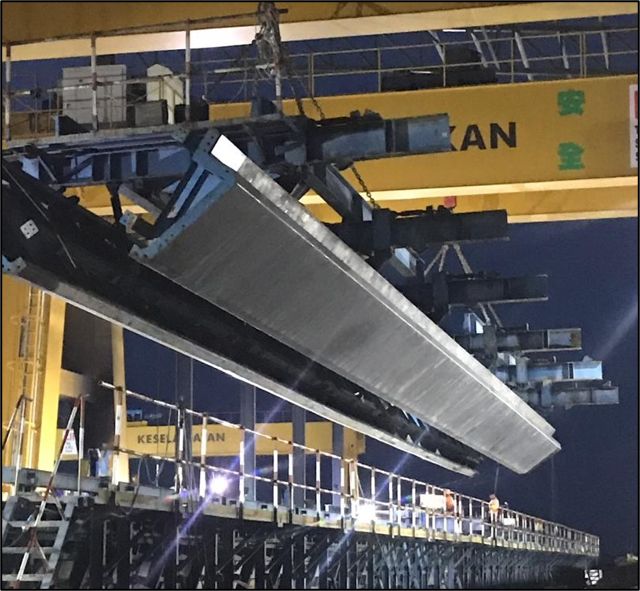
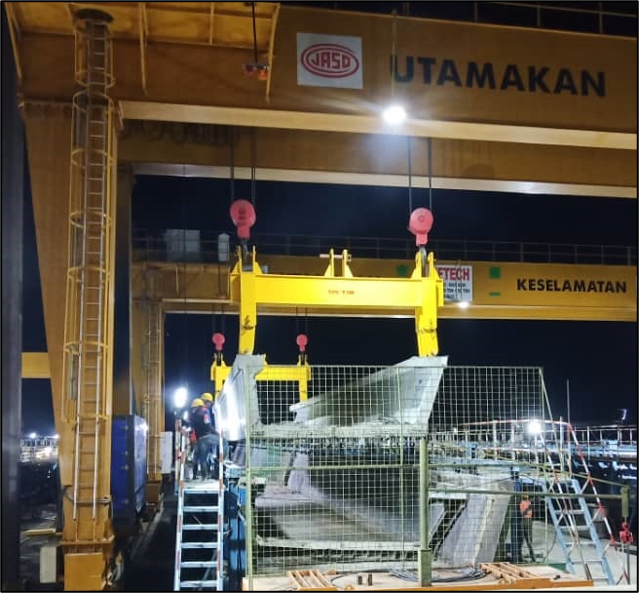
STEP 12: Lifting U-Trough Girder onto Multi-Axle Trailer